Replacing Crosshairs in Vintage External Adjustable Scopes
I’m a very active large bore black powder cartridge rifle silhouette (BPCRS) and .22 BPCR silhouette rifle shooter with aging eyes forcing me to use a riflescope which must have external adjustments per the match requirements. After researching the various scopes available, rather than spend $1,000 plus for modern copies of external adjustable scopes, I settled on J.W. Fecker vintage scopes which can be found in great shape for $500 to $600. “Fecker’s” were made from the early 1920’s to the 1950’s, but most of the ones I’ve run across and purchased were from the late 1920’s to mid 1930’s. Around the same time period, there were several other manufacturers of similar scopes, Stevens, Winchester, Unertl, Litschert and Lyman to name a few of the better known brands. Besides standard crosshairs, examples of other configurations included reticles with tapered or vertical post topped with a horizontal crosshair and crosshairs with one or more dots added.
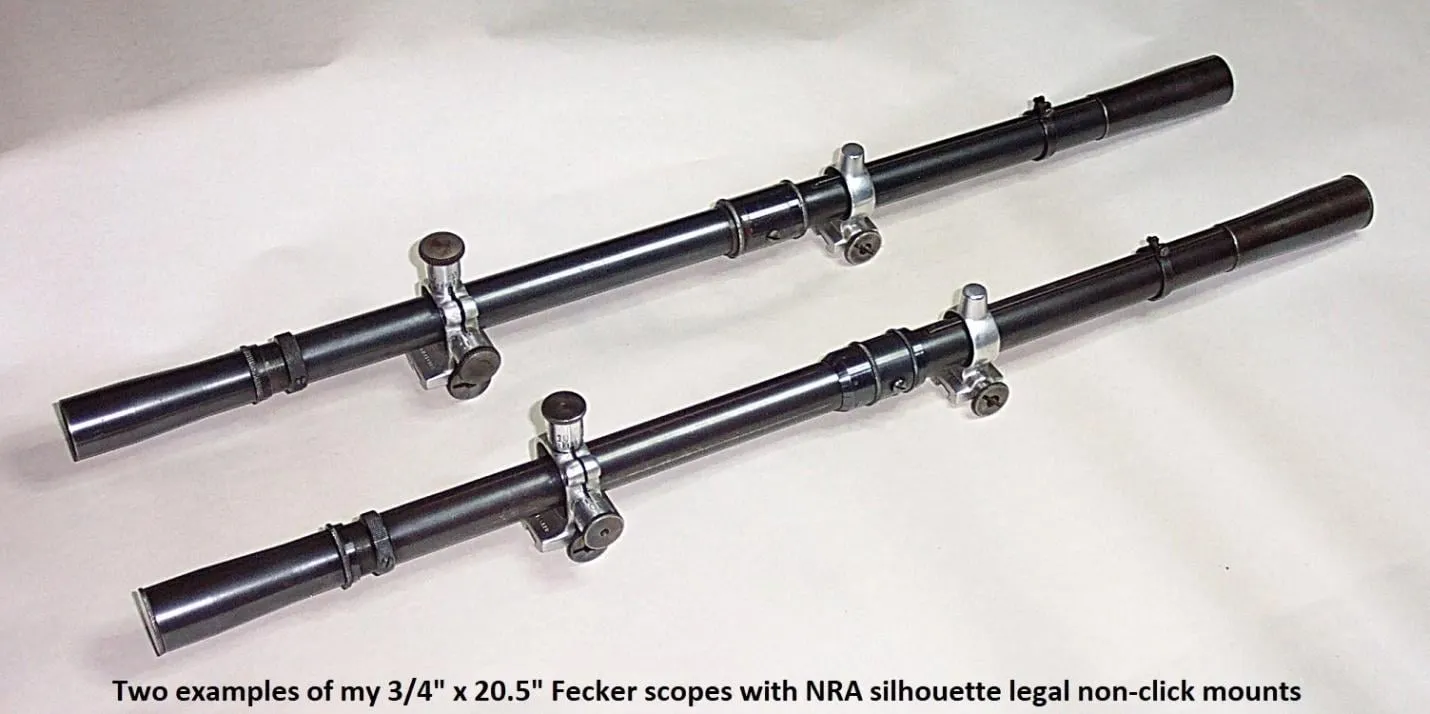
The vintage scopes have reticles with crosshairs made from fine wire, hair or even spider web. I remember reading about an old scope and transit repair guy that kept a few black widow spiders in separate jars in his shop. When replacing crosshairs he’d open a jar and, using a card with a hole in the center larger than the reticle, entice the spider to crawl onto the card; then gently shake it off so that it hung on its web. He’d roll the card a couple of times so that the web crossed the hole then drop the spider back into the jar. If a thicker crosshair was required the card was rolled additional times and two or more of the silk webs were combined with tweezers. I assume the card with the hole was gently positioned over the reticle and the web strands glued in place.
Over many decades, the fragile crosshairs can become dirty or damaged due to rough use. Damage can also result from removing the eyepiece (ocular) housing to clean the inside of the ocular lens or attempting to clean the crosshairs. It’s also somewhat common for the crosshairs to be destroyed while removing the reticle housing because one or both of the small reticle locking screws were stripped due to overzealous tightening after adjustment. The reticle housing is typically made of brass and has thin walls so it doesn’t take much torque to strip the threads. If the eyepiece and objective housings are never removed than its unlikely the crosshairs can become dirty. When the eyepiece housing is removed on some scopes, Fecker’s for example, the reticle is exposed at the end of the scope tube and there’s no protection for the extremely delicate crosshairs. See the photo below.
For various reasons I’ve replaced the crosshairs in several Fecker’s, a couple of Unertl’s and one Lyman. Two scopes were purchased for a very good price knowing the crosshairs were damaged. Some arrived with usable but dirty crosshairs, two of which I broke while attempting to clean them. One had both of the reticle locking screws stripped and required repairs, and another had a wide vertical post I replaced with a wire. It’s a delicate process and requires patience when handling the extremely fine wire which is thinner than a human hair and hard to see even with the aid of a magnifying glass.
Several years ago there was a fellow on eBay that replaced crosshairs if you removed and sent the reticle housing. But he’s no long offering the service. So you have three options depending on the situation. Crosshairs that have accumulated lint or dust can be very irritating to the viewer and may be cleaned if absolutely necessary, see my article titled, Wm Malcolm-Style Scope Adjustments & Repairs. As noted earlier, I’ve broken a couple during cleaning. Therefore, if the crosshairs are dirty but usable consider leaving well enough alone and live with it. If they must be replaced there are companies that specialize in vintage scope repairs including crosshair replacements, but the complete scope must be shipped to them and most have substantial backlogs. The remaining option is to do it yourself, which brings me to the subject of this article.
If you’ve decided to attempt replacing the crosshairs yourself, where do you start? What size wire is required and where can you buy it? Since I’d rather not experiment with black widow spiders, I’ve purchased 3ft lengths of tungsten crosshair wire from a fellow on eBay with the “handle” of “lostabundle”. Search for “crosshair wire”. He describes his fine wire as having a diameter of 0.0005” and medium as 0.0015” diameter. For target shooting or match competition I prefer the 0.0005” diameter wire which I consider very fine. The 0.0015” wire will also work. So as not to lose the crosshair in the image background, medium or thicker crosshairs are a better solution for hunting. Other sources of crosshair material include dental floss, human or animal hair. Human hair ranges from 0.0015” to 0.004” thick. Dental floss is made up of many very thin strands which are strong and around 0.0008” to 0.0010” thick and, if installed correctly, can result in a nice durable crosshair.
“Speaking” of using Dental floss, there is a YouTube video that details the process of using un-waxed dental floss to replace crosshairs. The link is https://www.youtube.com/watch?v=65Q-2E6Tz7M. The video assumes the reticle housing is removed from the scope. Due to the likelihood of damaging the crosshairs when reinstalling the reticle housing in Fecker scopes, I recommend leaving it in the scope tube while replacing the crosshairs, which may not be possible with some scopes such as Lyman’s and Unertl’s. If the crosshairs can be replaced without removing the housing, wrap the tube to protect it and clamp it in a vice as displayed in the following photo of Fecker crosshairs I recently replaced. In the following photo the 0.0005” crosshairs are quite hard to see and portions appear to be slightly dirty or dusty due to the reflected light, but they are very clean.
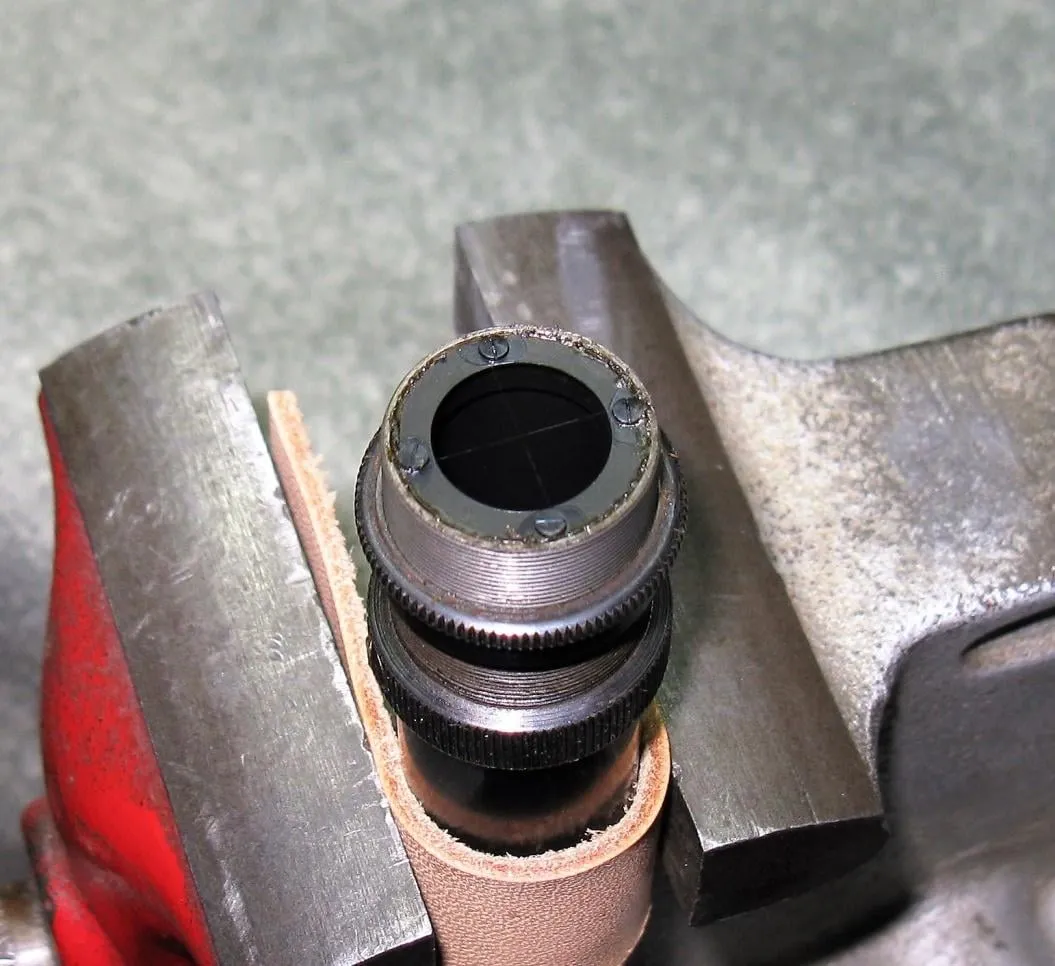
If the Fecker reticle housing must be removed, 1st completely unscrew the eyepiece housing and set it aside. Now remove the two opposing screws in the external knurled reticle alignment ring. Using a hooked tool of some type, gently hook the front edge of the reticle housing and pull it out. Some come out easily and others can be tough to remove. There are four very small screws evenly spaced around the edge of the reticle housing which are used to hold the crosshair wires in place. I prefer to use the screws as intended if they can be loosened, but the wires may be cemented in place if the screws cannot be loosened with the correct size jeweler’s screwdriver. You may find the screws missing if the reticles were previously replaced. If not, some may still find it easier to remove the screws and glue the wire in place (centered) over the holes. If I remember correctly, Lyman has a ring that holds the crosshairs which are glued in place. The ring is attached to the reticle housing with two screws. Similar to Fecker’s, the complete reticle housing can be remove or just the ring when replacing crosshairs.
By the way, at this point you will need a magnifying head set or desk-mounted magnification lamp.
When wrapping the wires or floss around the screws, wrap in opposite directions which positions the crossing point of the crosshairs in the center of the scope tube. I.e. wrap clockwise around one screw and counterclockwise around the opposite screw. If gluing, use a similar technique covered in the YouTube video but position the crosshair on the left side of one screw and on the right side of the opposite screw, or remove the screws and glue the wire in place over the center of the holes as mentioned earlier.
The above comments are based on my limited experiences replacing a few scope crosshairs and I have no interest or desire to work on scopes or replace crosshairs for others. Therefore you’ll have to tackle the job yourself or send the scope to a reputable scope repair company. I hope my comments have provided some insight on the process of crosshair replacement.
Wishing you great shooting,
Wayne