Loading BPCR Lube-Groove Ammunition
This is the 3rd article in a 4-part series on loading and testing black powder cartridge rifle (BPCR) ammunition. The 1st article was published in the May 2021 edition of The Single Shot Exchange Magazine (SSE) and titled, New Case Preparations for BPCR Competition. The 2nd article titled, BPCR Lube-Groove Cartridge Components was published in the April 2023 edition of the SSE. This article details the procedures I use to load BPCR lube-groove ammunition for silhouette competition. The next and final article will offer some techniques to determine the ideal powder charge for best accuracy.
The following steps assume the cases are of the correct length for the rifle chamber as detailed in the previous article titled, “New Case Preparations for BPCR Competition”.
Developing a BP cartridge load for your rifle is not difficult. Loading and handling black powder does require some special procedures and equipment which differs from that required for loading smokeless powder. The most important consideration is consistency. Consistency in your components and consistency in your loading techniques. A BP cartridge works best with a full or compressed case of powder. In order to determine what charge to begin with you must calculate the amount of the powder that will fill the case to the base of the bullet including the wad. That is accomplished by first determining the maximum cartridge overall length (COAL) with the bullet.
Determine the COAL.
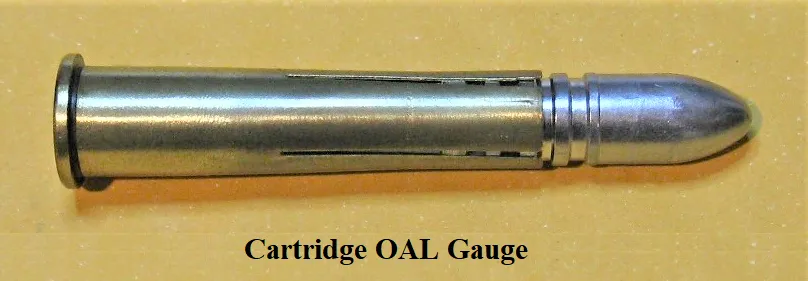
There are various techniques to determine the COAL including a trial-and-error method. Rather than a complicated multistep process used by some shooters, my preferred method is to split the neck of a case with a hacksaw or Dremel-type tool and partially insert the bullet. The split neck will hold the bullet in place under tension but will expand and allow the bullet to slide back into the case when the nose contacts the rifling leade. Chamber the cartridge and close the action. Slowly open the action and extract the cartridge. Measuring the overall length results in the COAL with the bullet touching the leade (start of the lands). Subtract 0.005” to allow for a fouled bore. Reusing the split case, the process is repeated if a different type or style of bullet is used or the alloy mix is changed, resulting in dimensional changes to the bullets and affecting the cartridge length.
Anneal the case necks.
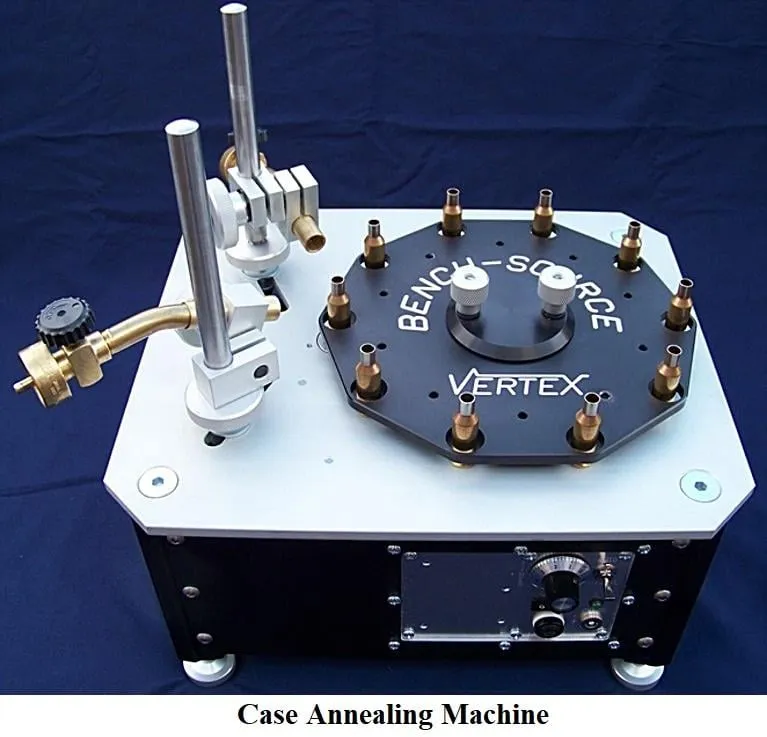
Annealing is recommended for new Starline brass and other brands of used cases, especially after having been fired several times and/or resized and the necks expanded, all of which work-hardens the necks. I have a very nice annealing machine and anneal after each firing, but most shooters do not anneal as frequently. Although “thumb-seated” bullets are loaded without significant neck tension, when the bullet is fired and obturates, annealing will help mitigate the negative effects on bullet release due to inconsistent hard necks.
Neck-only resize if necessary.
If fire-formed case necks IDs are too large for the bullets driving bands, neck resizing may be necessary. I use an aerosol case lube to spray the inside and outside of the necks for this step and the next. Hornady ONE SHOT is pictured but various case lubes are available from other reloading equipment suppliers.

Expand the case neck ID and “flare” the mouth.
Using a neck expander die, the neck is expanded to the correct inside diameter to allow thumb-seating bullets, and the mouth is slightly “flared”.
Flaring the case mouth aids in bullet insertion and, if not removed, ensures the case is centered in the chamber when the cartridge is chambered in the rifle. The case lip can be felt scraping the chamber wall as it’s chambered.
Insert primer and primer wad (if used).
For details on primers and primer wads see the previous article titled “BPCR Lube-Groove Cartridge Components”.
Add black powder and over-powder wad.
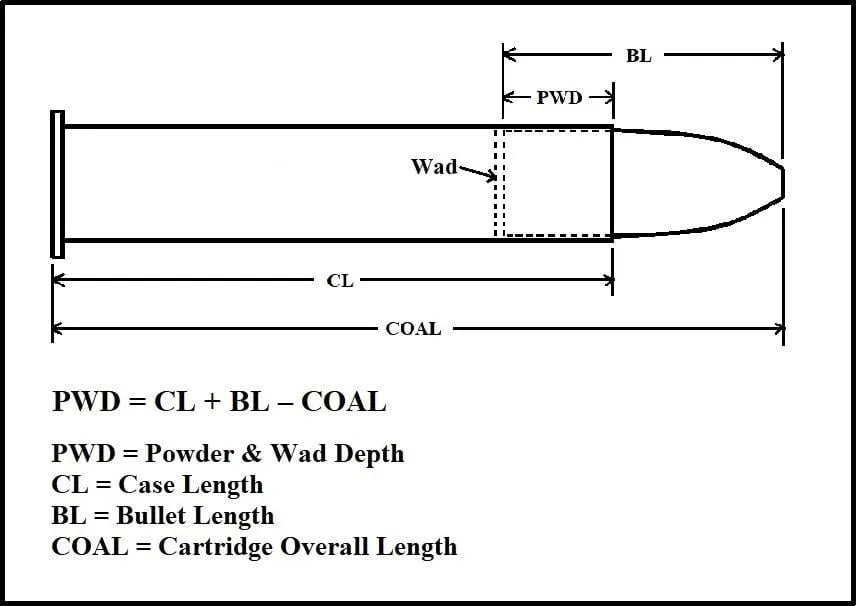
But first you need to determine the amount of powder required with an over-powder wad and with no powder compression. Since you’ve determined the COAL and you know the case length and bullet length, use the formula PWD = CL + BL – COAL to calculate the powder and wad depth. A tall drop tube is typically used to add the powder to take advantage of gravity to settle and compact the powder, thereby maximizing the amount of powder in the case. But there are other methods that will achieve similar results such as vibrating the filled case. Add powder until the depth is correct with the wad. I.e., a measurement from the top of the wad to the mouth or lip of the case should be equal to the calculated PWD. To measure the depth, use the back end of a vernier caliper or insert a wood dowel and mark the dowel at the case lip. Then measure the distance from the mark to the end of the dowel.
PWD Calculation
If you plan to compress the powder then add additional powder until the PWD is reduced the amount of compression desired. E.g., if you want 0.200” of compression and the no-compression PWD was calculated to be 0.500” then you would use a powder charge that would result in a PWD of 0.300”. Then when the powder column and wad are compressed 0.200” the bullet will be seated to the correct COAL.
I prefer vegetable fiber wads but I’ve also used low-density polyethylene (LDPE) “poly” wads, cardboard wads from tablet backing and wax coated wads punched out of milk cartons. In addition, I insert a thin wad punched from newsprint or very thin paper to eliminate any possibility that the over-powder wad will stick to the base of the bullet and affect down range accuracy.
If using LDPE wads, it’s especially important to ensure the inside of the case necks are clean. Under firing pressure LDPE wads will grip the neck wall much tighter than paper or vegetable fiber wads and significant case stretching can result due to increase friction.
Compress the powder and wads.
The powder and wads are compressed using a compression die. As discussed earlier, the compression amount is determined by the powder depth (PD), the wad thicknesses (WT) and the COAL. Therefore, the amount of compression is a direct result of the amount of powder. Goex generally likes significant compression in the range of 0.200” to 0.400”. Swiss requires little or no compression but will work well with compression if desired. If powder compression is used, do not skip this step and attempt to use the bullet to compress the powder when seating the bullet. The typical BPCR cast bullet is too soft and will be deformed, resulting in loss of accuracy.
Insert the lubed bullet.
Although I thumb-seat bullets, many shooters prefer some neck tension and use a seating die to seat the bullet. Others go so far as to slightly crimp the bullet in place.
If significant neck tension is used, the bullet should be inserted with a seating die with a plug that matches the bullet nose shape or risk deforming the bullet. If the correct plug is not available, one can be made with an oversize plug and epoxy. Coat the bullet nose with wax and use it to form the epoxy into the plug until it hardens. If using significant neck tension, in order to ensure uniform and consistent bullet release when fired, the case necks should be annealed on a regular schedule and loaded cartridges checked for excessive bullet run out (concentricity). If the bullets are thumb seated with no appreciable neck tension than there’s little or no value to checking bullet run out.
In closing I’ll leave you with some appropriate comments on the subject from Charlie Maxwell. Charlie frequents many of the BPCR discussion forums where he goes by the “handle” of Montana Charlie. When asked about the importance of checking bullet run out, he responded, “Among us, the debate would have to start with ‘neck tension, or not’…but we don’t debate that much. Those who carefully size the case neck to provide a certain amount of grip also need to anneal on some regular schedule so that the neck’s ability to grip remains uniform. All believe that consistent neck tension is critical, but many sidestep the entire issue by thumb-seating bullets in fire-formed necks with no tension. We feel that no neck tension is as ‘consistent’ as one can get. Of those who do regulate neck tension, many of them pay attention to concentricity (run out). Usually, they handle that by using an in-line seating die. For the rest of us… well, if you can make a bullet ‘crooked’ by just looking at it cross eyed… a proper fit in the chamber will pull it back to ‘straight’ when it’s loaded. And that ‘perfect fit’ is not just a euphemism. We probably spend just as much time and effort on obtaining that ‘perfect fit’ as others do checking for run out. Chamber casts and custom bullet moulds are the first major steps in that quest.”
Wishing you great shooting,
Wayne