Evaluation of the RCBS Easy Melt Casting Furnace with PID
Assuming you’ve read my article titled, Casting with a PID Controller, it’s now apparent the information is already outdated to some extent since the article discussed using a separate PID controller to regulate the furnace temperature. If you’re not familiar with PID (Proportional-Integral-Derivative) controllers, check out my article or go online and research the subject. You’ll find plenty of information on PIDs.
Since writing the article, two companies, RCBS and Lyman have recently introduced new casting furnaces with easy to program digital temperature controllers built in. Although the product descriptions of the Lyman Mag 25, RCBS ProMelt 2 and RCBS Easy Melt do not use the term PID, it’s clear the controller systems are PIDs. All are advertised to hold 25 lbs of alloy. The RCBS ProMelt 2 and Lyman Mag 25 are bottom pour designs but can also be used for ladle dipping. It seems the casting equipment suppliers are finally starting to wake up to the use of digital technology. No doubt there will be more offerings to come. I bet Lee Precision won’t be left in the dust for long and Waage, considered by many to be the one that other “dipping pots” are measured against, may have to upgrade their furnace to stay competitive.
Shooters and especially those that cast their own bullets tend to be very conservative about adapting to new technology. A couple of typical comments might be: Why spend $130 for a furnace when the Lee Precision Magnum Melter is less than $62? Or why would anyone want to spend good money for a Chinese made “disposable” digital pot when the old designs continue to work reliably for years and years? Although reliability is certainly a consideration, minimizing the weight variations of cast bullets is the main reason for using a PID temperature controlled furnace. But I’m getting off the subject a bit. Let’s discuss the Easy Melt Furnace pictured below.
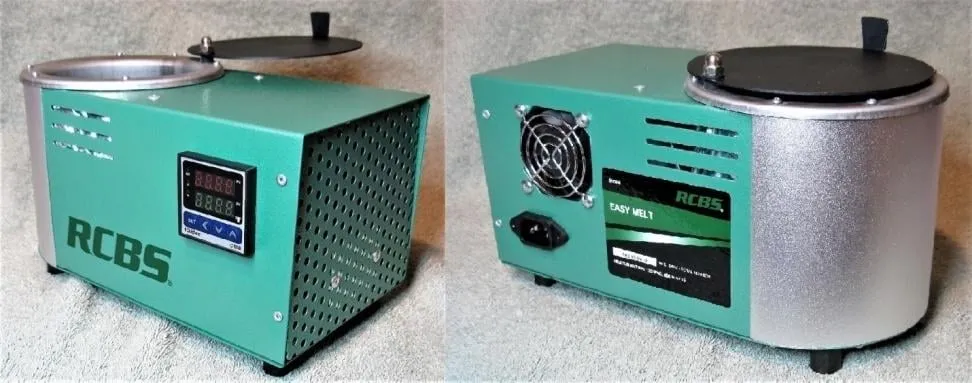
MidwayUSA’s regular price for the RCBS Easy Melt is $129.99 plus shipping, but I was fortunate to order the unit while RCBS was offering a $25 rebate and also while MidwayUSA had discounted the price to $109.99 for a limited time. Following are my observations after unpacking the unit and checking it out closely. Keep in mind that I’ve been ladle dipping out of a RCBS Pro-Melt pot for many years and added a separate and rather expensive PID controller almost 3 years ago. I also have an electronics background and I’m somewhat familiar with PIDs.
Initial observations
- The Easy Melt arrived in a very well padded RCBS box.
- The unit is 11” long x 6” wide x 7.25” tall including the 3/4” metal feet and finger tab on the cover plate. It’s listed as holding up to 25 lbs of alloy, but will hold approximately 28 lbs. The pot is 4-3/4” deep, 4-7/16” in diameter and is made of a magnetic type of stainless steel. Yes, some types of stainless steels are magnetic. Empty, without the removable power cord, the furnace weighs 5 lbs 13.2 oz and comes with a 2-year limited warranty.
- It appears to be well designed and constructed. There is nothing on the unit or in the user manual that indicates where it’s made. But since the model C10B temperature controller and SSR-25DA solid state relay are both manufactured by tQidec in China, it was my initial assumption that the entire unit is sourced from China, which should not come as a surprise and was later verified by a RCBS representative. Based on the mfg. date / serial number it seems my unit was manufactured in Jan, 2018 and is serial number 10.
- The housing is pop-riveted together; hence it’s not assembled to allow for easy access to the internal parts.
- The rounded front panel around the pot is matt-finished aluminum. The rear steel housing that holds the PID electronics appears to be finished with the durable crinkle-finished green powder-coating RCBS uses on their older line of pots.
- The flat-black painted steel pot cover / mould warming plate easily rotates out of the way for full access to the pot. I assume the paint or coating is rated for high temperature.
- Although there’s no on/off switch (see the warnings noted below), simple power-down instructions are in the user manual, which definitely should be followed.
- By peering through the ventilation holes next to the pot it’s obvious the pot is insulated from the electronics by heavy aluminum foil and with a metal baffle plate that separates the pot from the control electronics.
- The housing surrounding the control electronics has lots of ventilation holes on the sides, back and bottom, and a small shielded fan is mounted on one side to draw in cool air and expel warm air out the vent holes around the electronics and around the back of the pot. The fan and power cord socket are located on one side and the PID control panel is located on the opposite side.
- Based on the control panel and by peering at the internal electronics through the various ventilation holes and between the fan blades with a flashlight, the PID design is obvious, consisting of a temperature controller and solid state relay (SSR). As can be seen in the photo, the SSR, which handles the current required for the heating coil and tends to get hot, is pop-riveted to the metal back plate surrounded by plenty of ventilation holes. The combination of airflow and heat sinking of the rear plate should be sufficient to keep the SSR cool. In addition to the controller and SSR, there is a plastic module strapped to the bottom of the controller with a cable tie. Since the two input wires are routed from the power plug and the two output wires are connected to the 12v DC fan, the module obviously contains an 115v AC to 12v DC converter to provide power to the PID.
- The parts illustration in the user manual only lists the melting pot, baffle plate and outside housing components. None of the electronic components including the ventilation fan are pictured or listed. The RCBS representative I spoke with indicated that no replacement parts are available. Therefore, if the unit fails to function after the 2-year warranty expires, by drilling out the back panel pop rivets it should be an easy fix to replace the temperature controller, SSR or both. These are cheaply available from many sources including Amazon.com and eBay. The heating coil surrounding the pot may be another matter if it burns out.
Operating observations
Note - For the following discussion and as labeled on the front panel of the controller: SV is the Set Value or desired alloy temperature, PV is the Present Value or measured alloy temperature.
I set up the unit on my casting table, tossed in a few lbs of alloy and, following the instructions in the user manual, easily programmed the controller for a set value (SV) of 760 degrees, my preferred casting temperature for 16:1 alloy .40 cal bullets. After the initial alloy was melted, additional ingots were added for a total of 26 lbs. As can be seen in the photo, the pot could have held an additional pound or two.
As the alloy was melting the alloy temperature was tracked with a relatively new RCBS analog thermometer and a digital meter with a thermocouple probe inserted into the alloy. The actual alloy temperature did not closely track (was many degrees less than) the PV until the PV approached the SV. The “lag” between the alloy temperature and the PV was approximately 60 degrees. Once the PV was reached and held to a constant value by the controller, the alloy temperature increased to within approximately 3 degrees of the PV, which is within limit considering the inherent accuracy of the thermometer and the control precision of the PID.
For the same reason noted above, when a cold ladle was introduced into the full pot of 760 degree alloy, the PV only dropped 3 degrees. But I know for a fact, by measuring the alloy temperature with the thermocouple-based digital meter and also when casting with the much more expensive and separate PID with my other pot, the actual temperature drop is about 25 degrees with 22 lbs of alloy. I’m convinced the difference is either due to the algorithm (specialized firmware) programmed into the controller and/or the placement of the thermocouple which is attached inside the pot housing but on the outside of the pot. Therefore, for the above noted reasons, it would be a mistake to assume the PV was the actual alloy temperature prior to the alloy temperature and the PV “catching up” to the SV. Once the PV and SV agreed, just to be sure, I waited a few minutes to start casting.
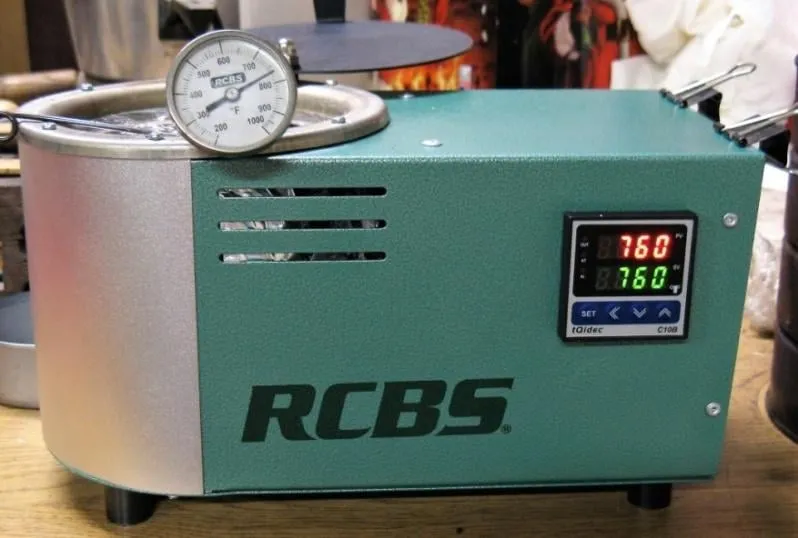
BTW, you may be wondering about the two clips on the back end of the furnace in the photo. While dipping with the ladle I place the mould mallet, pictured in the next photo, on top of the furnace in easy reach. The clips were added to keep the round mallet from rolling off.
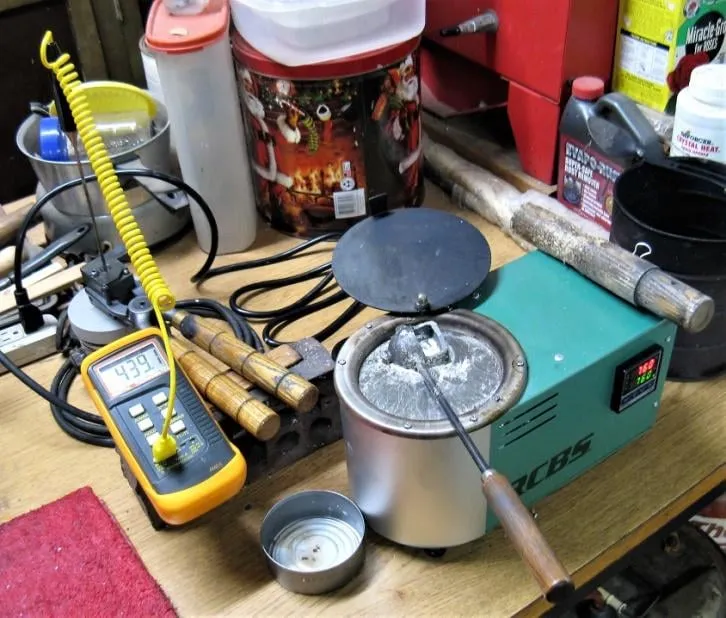
In the above photo I’m getting ready to cast. The pot is up to temperature and the Buffalo Arms single-cavity cast iron mould, which is heating up on a small hot plate, is almost ready. The mould temperature is being monitored by a digital meter with a thermocouple probe inserted into the mould cavity. I start casting when the mould is between 440 and 450 degrees which eliminates rejects due to less-than-optimal mould temperatures.
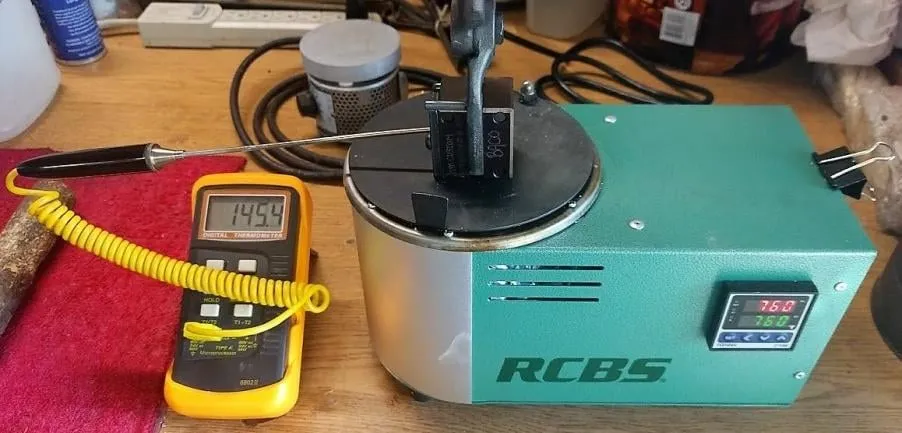
To determine how well the warming plate works, the mould was placed on the plate while the pot was coming up to casting temperature. By monitoring the mould with the digital meter and thermocouple probe as displayed in the above photo, the mould was at 145.4 degrees when the alloy reached the PV casting temperature. It’s certainly better than starting to cast with a cold mould but it never reached the temperature I prefer to start with as noted earlier. To determine how hot the mould would get up to, it was left on the plate for an additional 2 hours. 235 degrees was the maximum which depends to some extent on the alloy and ambient room temperature. BTW, positioning the mould and handle vertical worked a lot better to ensure it was in full contact with the plate. I’ll have to use this technique when using the small hot plate in the future rather than “shimming” the horizontal handle to ensure the mould lies flat on the plate as pictured in the earlier photo.
During two sessions a total of 270 bullets were cast with each sprue being returned to the pot, during which the PV never deviated from the SV by more than 1 degree. But due to the lag between SV and PV the 1 degree is not meaningful or significant since, while casting, the alloy temperature was also monitored with the digital meter and thermocouple probe. The alloy temperature actually ranged + 3 degree to - 4 degrees of the SV setting. With my RCBS Pro-Melt pot and separate higher precision PID the range was slightly better but not by much, but the PV closely matched the actual alloy temperature. After casting, each bullet was weighed in the order cast. The weight variation of both sessions was within +/- 0.5grs which is the same results I typically obtain with the Pro-Melt pot and separate PID controller.
Warnings to heed when using the Easy Melt
- Do not touch the front panel (rounded) portion of the furnace when in use. The unit came with a stick-on warning label on the front which I pulled off. I can “speak” from experience, having accidently brushed the back of my hand against the front, it’s extremely hot since there’s little or no insulation, except possibly a thin air gap, between the pot and the front panel. The same warning applies to the finger tab on the pot cover / mould warming plate. I’ll guarantee you’ll only grab it once with bare fingers to rotate it out of the way for casting.
- The following is not listed as a warning in the user manual but it should be. Be sure to follow the instructions concerning turning off the unit. Leave it plugged in (power on) until the PV display reads 160 degrees or less. Unplugging the unit disables the ventilation fan allowing the residual heat from the pot to heat up and possibly damage the plastic ventilation fan or the plastic housings containing the electronics in the rear of the unit. During discussions with an RCBS representative it’s clear this is the reason the unit does not have an on/off switch. BTW, it takes a long time, well over 2 hrs for a pot filled with 20 lbs of alloy to cool down from 760 to 160 degrees.
Final comments
Based on this evaluation and considering the limitations discussed, I recommend the RCBS Easy Melt for those looking for a digital-controlled furnace for ladle dipping. The controller was not as sensitive and did not track the alloy temperature near as close as my more expensive PID, but it did the job (outcome was the same), and the furnace costs about half what I paid for the separate PID alone. Therefore, unless you’re prepared to purchase a Lee Precision Magnum Melter and build a separate PID, all of which could be bought for around $100.00, considering MidwayUSA’s regular price of $129.99 plus shipping, the RCBS Easy Melt is a good deal. Hopefully it will function reliably for many years. Due to the smaller footprint and larger diameter pot, I plan on using it for my main furnace with the RCBS Pro-Melt and separate PID as a backup or with a different alloy mix.
Wishing you great shooting,
Wayne